Again, not an audio post!
But this is a project that has been going for almost a year and a half, and needed to be finished before I can dedicate myself to the big audio project I want to undertake.
Years ago I was at the pediatrician (aka children’s doctor) where they had built a car cockpit complete with steering wheel and gauges. The kids loved it, and frankly so did I. But- nothing worked for real of course. I thought I could do better, so I scoured eBay and scored a BMW E36 dashboard, a playstation2 gas / brake pedal and a steering wheel from a 1987 Ford Scorpio.
Of course, that was only the start of it and procrastination, as well as finding out the bimmer dashboard was dead, meant massive delays and what I hoped would take a few weeks of evenings ended up taking a year and a half (that is, two christmas and one birthday deadline missed). This year, the boy turned 4 and it would be the ideal time to deliver the project, never mind finally finishing something!
Steering wheel
I deliberately chose this old one because it has no airbag that could go off or would already have gone off leaving a large hole. However, it turned out to be locked in position. So some careful violence was called for. Suffice to say that if you need to steal a 1987 Ford Scorpio and have a hammer ready, I know exactly where and how to hit the steering column.
The wheel has two stalks, left for indicating and high beam, right for wiper control. The indicator stalk mechanically auto-cancels after turning the wheel. Nice!
After some (dozen) hours of multimeter fun, I’d figured out the cable harness and soldered it to a nice automotive grade connector to be mated to the one on the arduino side. The left stalk is fed to the arduino inputs, the right one goes straight to the dash and illuminates various bulbs, such as oil warning, ABS, parking brake etc. Just to put on a show.
Arduino Leonardo have internal pull-up resistors (disabled by default) – this makes it the best and easy to choose GND for COM and treat the inputs as LOW ACTIVE.
Dashboard
Of course on eBay again (are there other places to buy stuff?) I got a BMW E36 dashboard. Unfortunately the first one I got had a dead controller PCB, and after trying for ages to drive the gauges directly I finally realised it would be cheaper to bin it and buy another one, which I managed for to do for the capital sum of 1 euro. Apparently I need to work out my hourly rate and make myself aware of it.
I chose this dashboard because it has every gauge under the sun, so lots of stuff that can move, and the pinout is known from the electrical trouble shooting manual.
After extensive testing and trying over the span of a week or so I had the functionality mostly figured out.
Most bulbs can be driven directly and are tied to common 12V; you then only need to ground the other end to light the bulb. Some (e.g. high beam) you need to pull UP however which is not easy for the Arduino with its puny 3.3V I/O. For this, I used an L293 driver as level shifter/inverter from the arduino output. The L293 also drives the ignition contact switch (KL30), and the indicator bulbs. The dasboard turns out to have an internal relay to generate the typical click-clack indicator sounds. It looks like they perform an OR function on left and right; if you switch quickly enough from left to right the indicator relay stays on 🙂
The RPM gauge simply counts ignition pulses (2 per engine rotation for a 4 cylinder, 4 stroke engine) so it’s dead easy to indicate RPM. Speed is similar, simply counting wheel pulses.
The other gauges are all measuring DC voltage and will run just fine from the PWM outputs of an Arduino which runs at 500 Hz without any filtering. However, every gauge has a particularity:
- Tank gauge: the dashboard does not like the value changing too quickly and assumes the fuel is sloshing around in the tank slapping the floater sensor around, so simply freezes the indicator. Therefore the voltage needs to be changed s l o w l y . Also, it can not increase while the ignition contact is on (leading many BMW users on the forum to suggest you turn the car off while putting fuel in – probably a good idea!)
- Temp gauge: only gets updates if the engine runs, i.e. RPM indicator receiving pulses. After all, what use is engine temp if the engine is stopped? Also, this one is highly non-linear. During the high PWM duty cycles it quickly ramps up from cold to centre, then spends what looks like an eternity stuck at rock centre, and only moves up to the red zone during the last 5% of the duty cycle range. That’s probably why there are no numbers on the scale.
- Economy: moves automatically to infinity once speed goes down to zero and RPM > 0. After all, when the car is stationary with engine running, you’re going to use infinite liters of fuel to travel 100 kilometers.
Gas / Brake pedal
This one came from a playstation. I think. Again, eBay, again, 1 euro. It had a serial (DB9) connector so I spent an hour with a serial terminal before getting frustrated and opening the thing up, to discover two potentiometers.
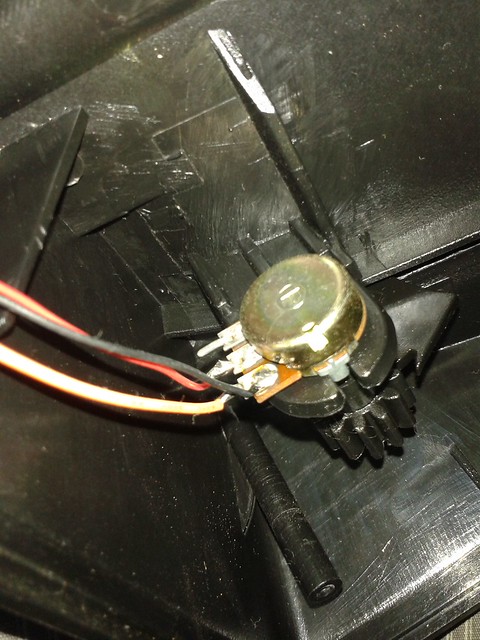
the pedal, through rack and pinion, turns a pot. Tadah…
All analogue therefore. Since only the wiper and the end are connected, I should have used current sources to get a linear position-to-voltage readout. I cheated and used resistors that I connected to 12V for maximum impedance. It works a treat and who notices any non-linearity with their foot?
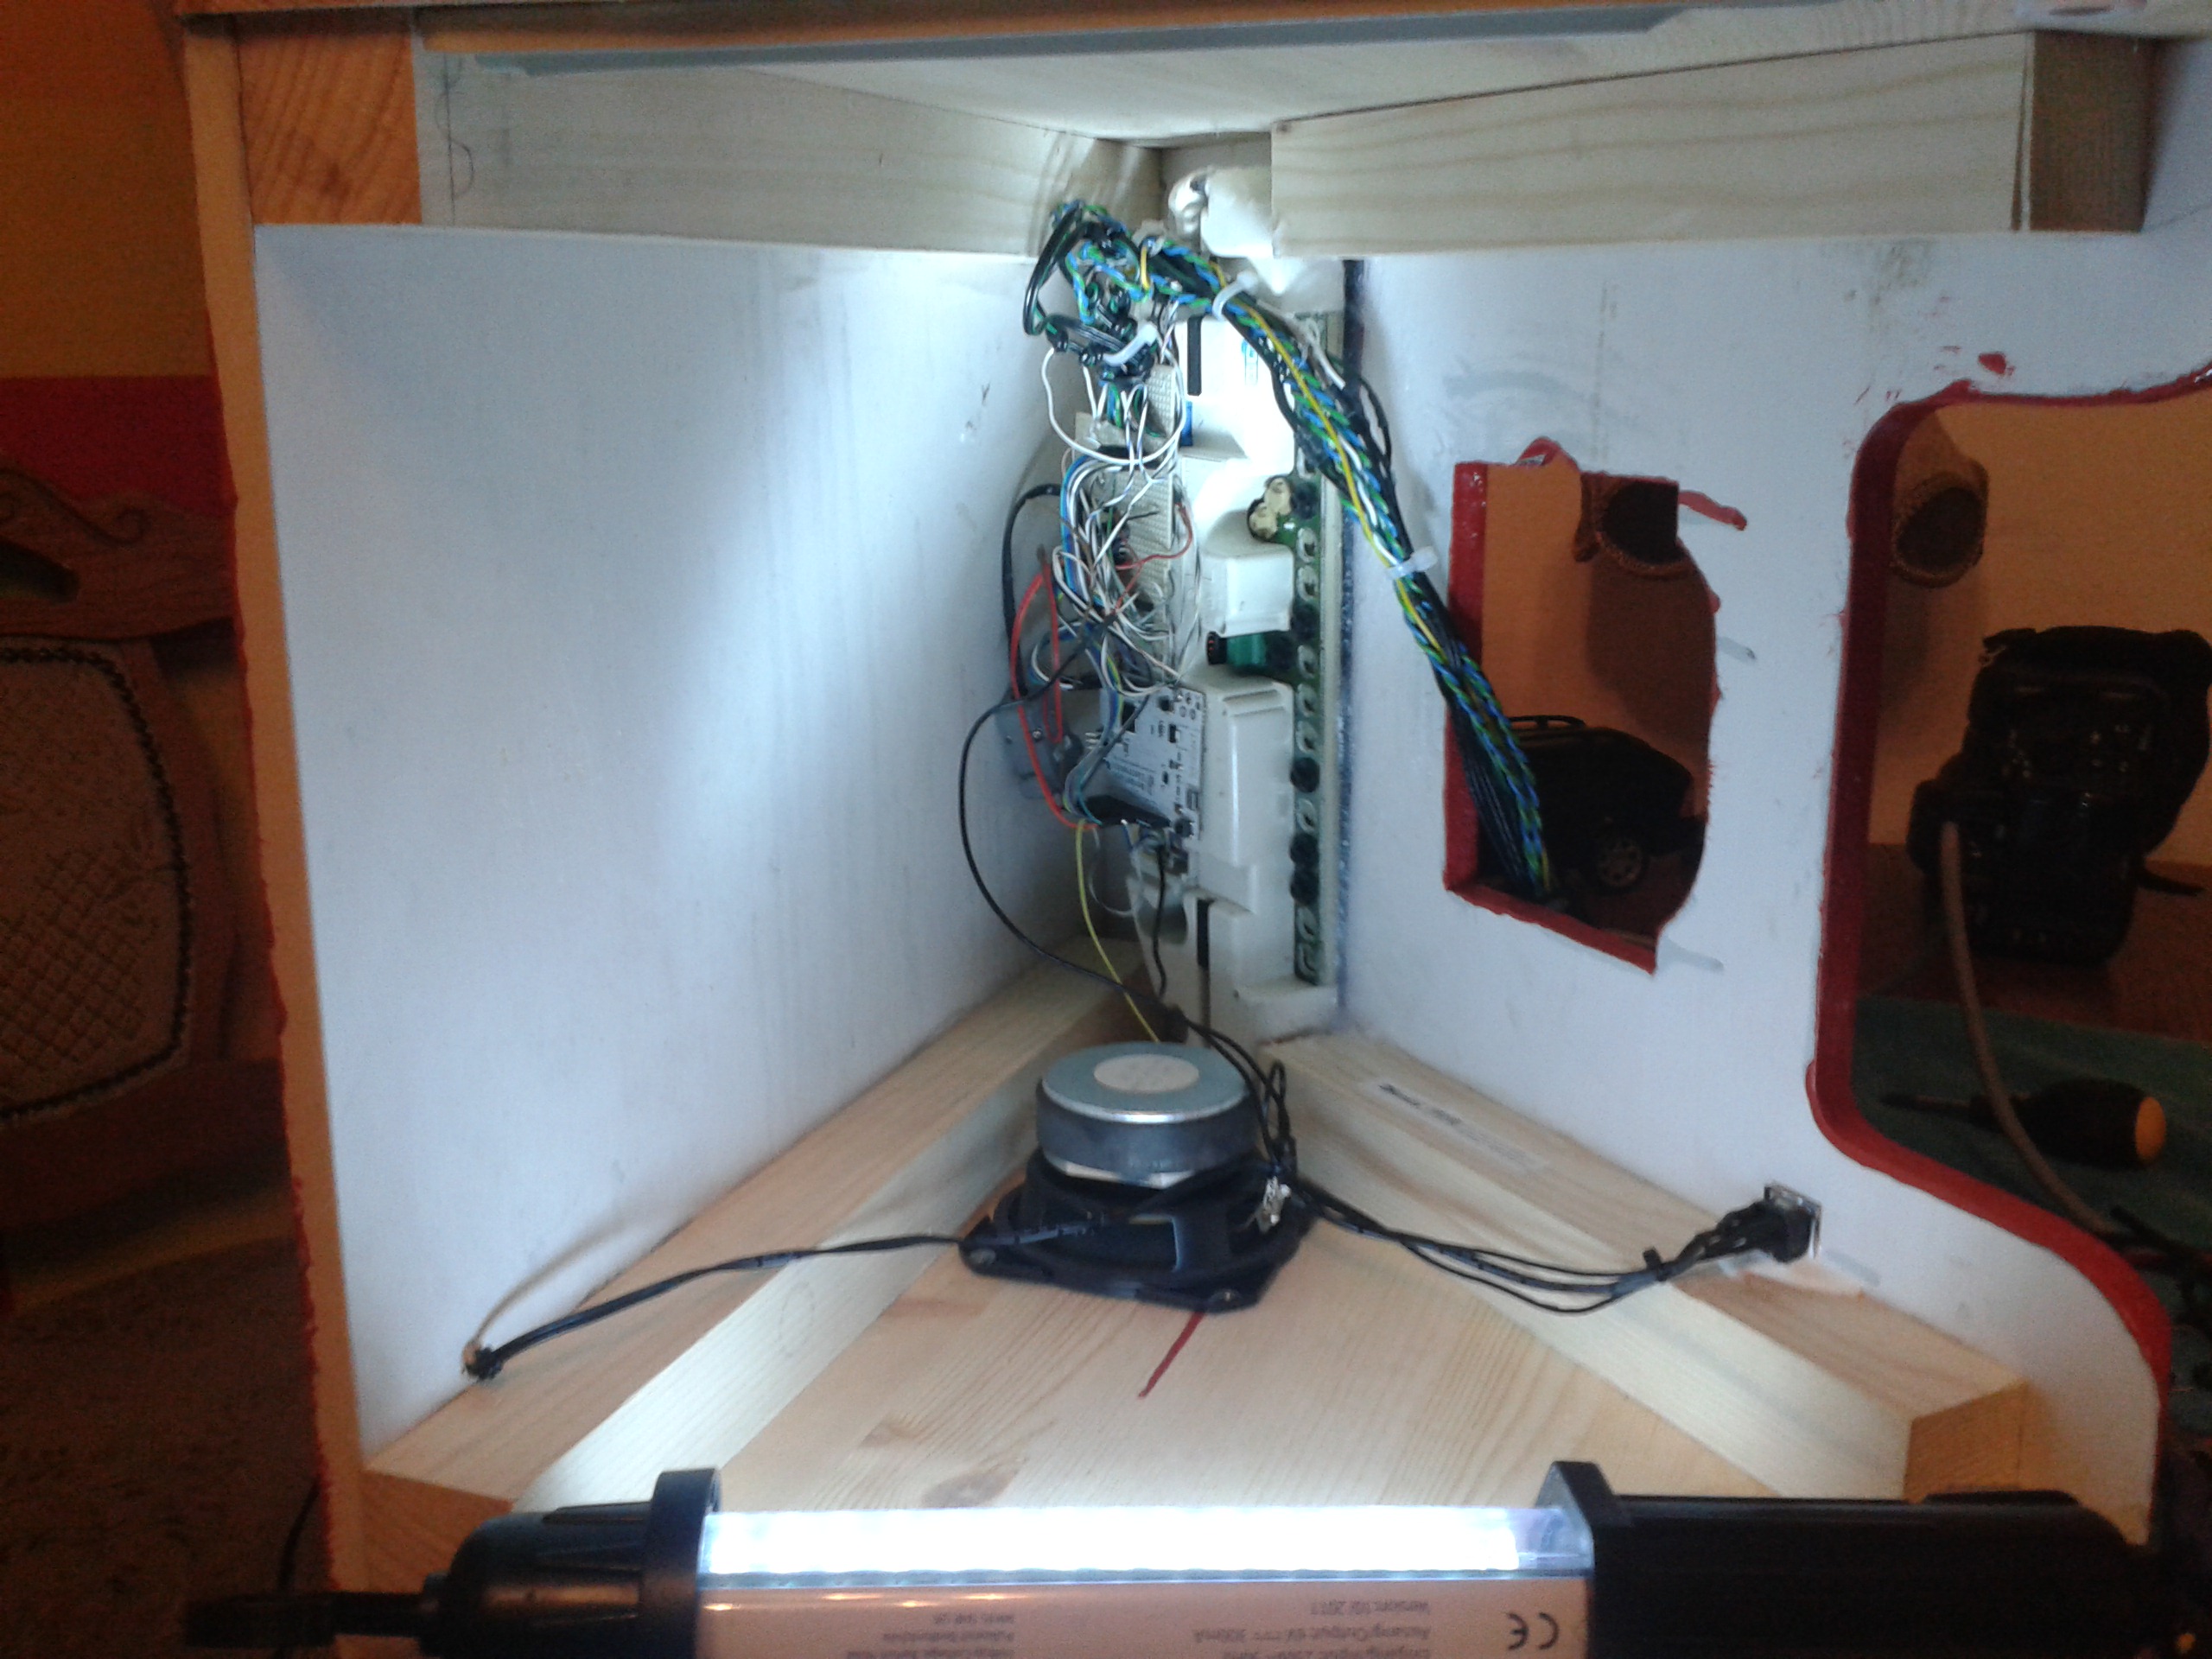
The control
The glue between dashboard, steering wheel and pedal is an arduino leonardo. I started out with a simple PIC microcontroller but ran spectacularly out of I/O lines (there is a lot of I/O in this thing) and I just got 5 boards for 50 euros on Kickstarter from Borderless Electronics.

The ‘brain’
The nice thing about this board is the integration; direct USB connection, integrated voltage regulator which means I can hang it directly on the 12V rail, and loads of I/Os.
Coding in simplified C is completely easy and at less than half the price of a raspberry Pi, it’s exactly the right application here. The only downside is poor timer control which meant that the loudspeaker, speed and RPM gauge were never going to be timed perfectly. For the gauges this means a certain inaccuracy especially at high values; for the loudspeaker it means a less pure tone. Let’s call it ‘real engine sound design’.
The software
If this thing has a chance of being liked by children, it needs to be realistic. They are very good at spotting a fake!
I therefore decided to construct an actual model of a car’s engine and work out all the controls from there. So, using -carefully tuned- constants for stiction, wheel friction (linear), air friction (quadratic), gear ratio, brake and/or gas pedal amount from the current RPM an RPM increase/decrease is calculated. From the RPM and gear ratio follows the speed.
The gear box had to be automatic due to having only two pedals available. The threshold of switching up/down is not fixed but has hysteresis which is modulated by the gas pedal, i.e. when you floor it, it revs up higher before going into the next gear and when you drive gently, it gears up sooner. The use of this hysteresis gear switching also yields a double kick-down effect when cruising at a given speed and burying the throttle. 🙂
Some less or more realistic functionality which adds fun:
- the engine temperature ramps up from cold to centre over the first 200 seconds of operation.
- keeping the RPM over 4000 will increase the temperature and eventually flash the over temperature warning light. Going off the revs will bring it back to centre.
- The revlimiter has a bit of random modulation to simulate a real engine redlining.
- Keeping one foot on the brake and the other on the gas allows you to rev the engine without driving. But you can redline it and then release the brake to do launch control.
- The engine consumes fuel based on the gas pedal setting; eventually fuel will run out, the car will slow down, come to a halt and the engine will turn off. The engine consumes quite a lot, I got less than 100 km on a tank (the idea here was to protect the parents from all-day-long driving noises). However, turning the car back on restores a full fuel tank. I haven’t yet succeeded in porting this behaviour to my car.
The Build
The idea was to make a table with a top that folds away to reveal the car. This way this thing which takes up an amount of space that is not easily overlooked, has some practical value as well.
And yeah, I was a pretty shoddy woodworker when I built tube amplifiers and if anything, 10 years down the line I’m a lot worse. But I haven’t given up on red yet 🙂
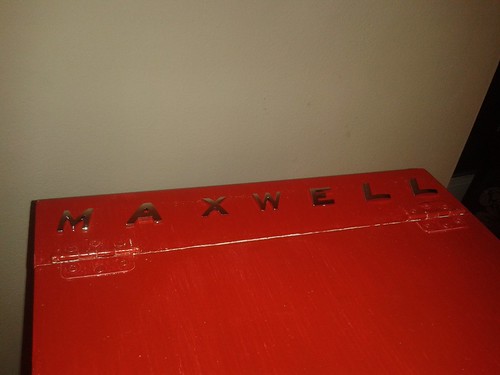
An additional gift from colleagues to make it ‘complete’
The finished product and the customer presentation 🙂
I don’t think I’ve ever been this nervous about a product presentation to any customer before. Maybe we should all build our stuff for our children as it motivates unlike anything I’ve experienced previously.
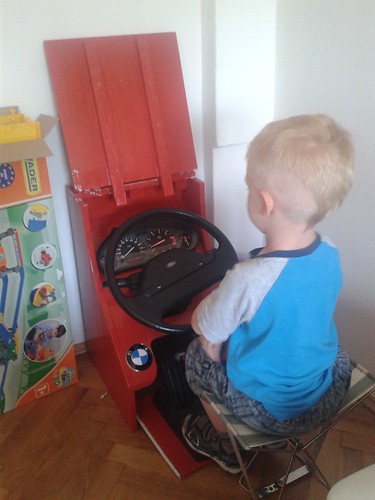
The customer seems to approve…
The following video was made on the night before the presentation; I found a few software bugs, a blown bulb and a loose wire. Talk about last minute project stress.
The great moment of unveiling. Although it was more nerve-wracking than getting married, it did go even better.
Getting the hang of it, slowly
All the kids dig it, even the girls. Maxwell did give permission to drive as long as she promised to not go too fast. Now, where did he hear that line?
After a few hours practice he got really good. Although it is worrying to see him drive exactly like me (one hand on the wheel, sloppy driver).