
All we are is dust in the win… eh, on the eval board.
Another post, another D/A converter. Yes, this is one of my soap boxes and hopefully I’ll be able to post something else soon. Sorry folks, we have to get through this… 🙂 Continue reading
All we are is dust in the win… eh, on the eval board.
Another post, another D/A converter. Yes, this is one of my soap boxes and hopefully I’ll be able to post something else soon. Sorry folks, we have to get through this… 🙂 Continue reading
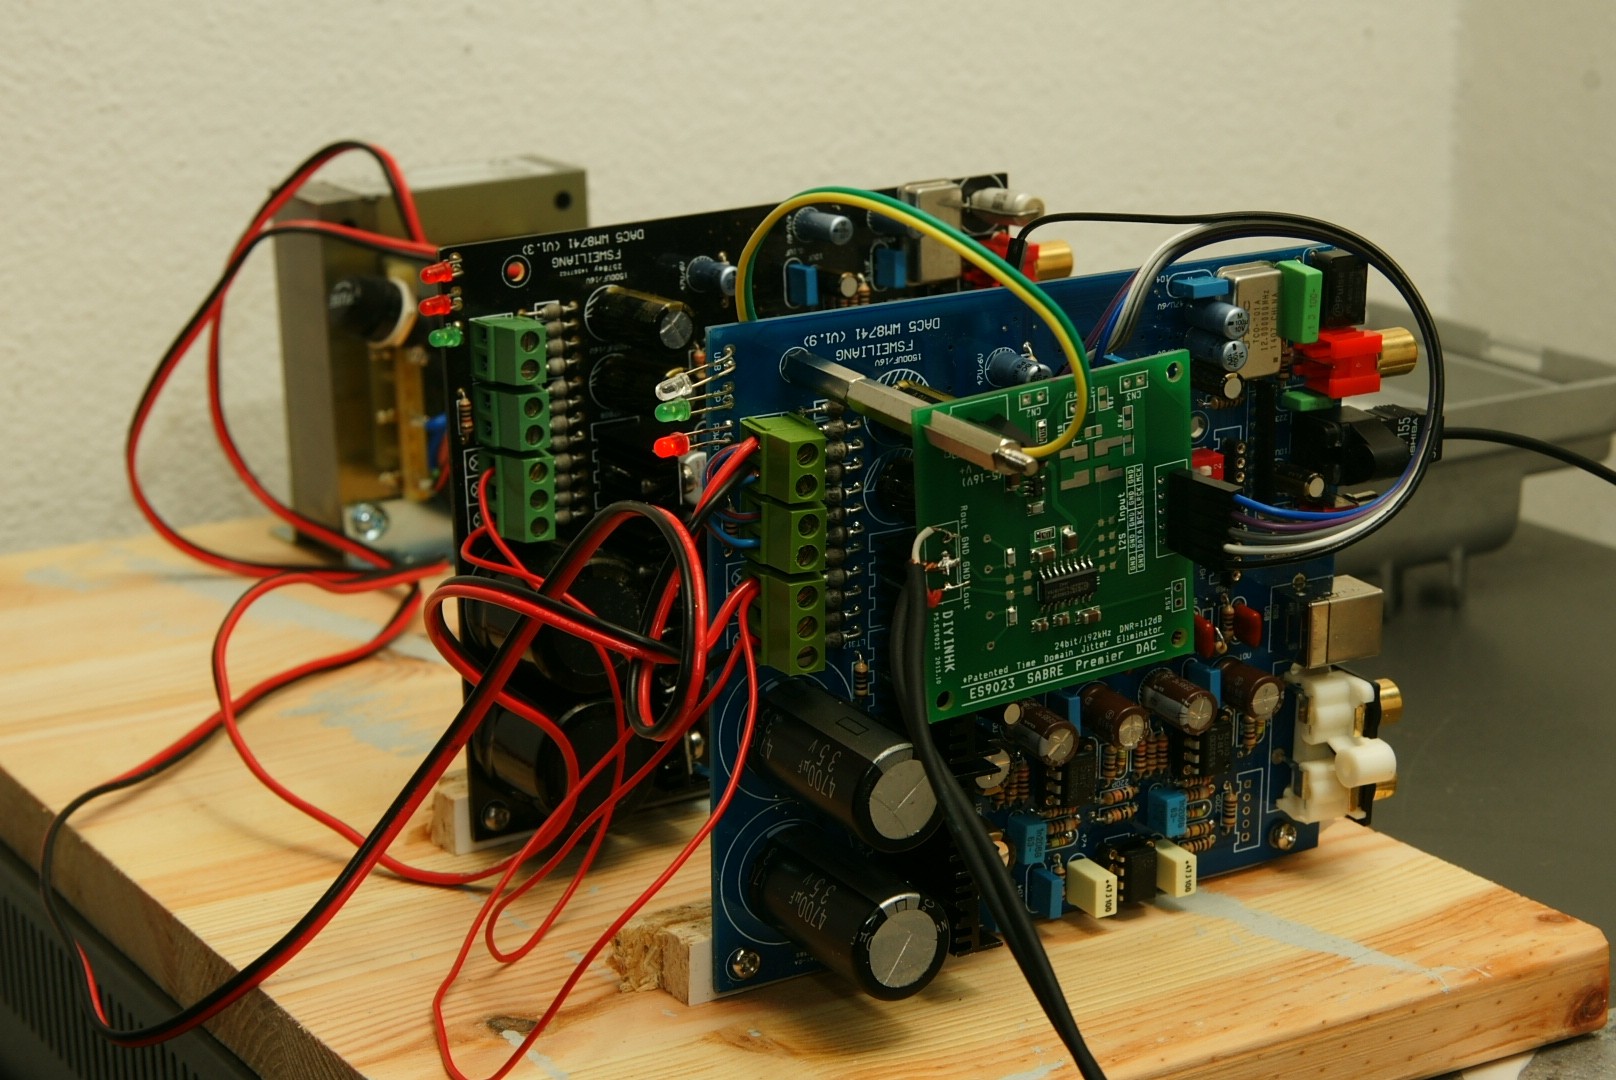
Another D/A converter chip had the pleasure of spending some time with the Audio Precision. This time it was the ADAU1966, on the official evaluation board from Analog Devices. Continue reading
The following measurements were taken with an M-audio Delta 1010 sound card, using channels 7 and 8. These cards have an AKM AK4393 D/A converter. The M-audio has an otherwise fault-free design and is a great converter for the price.
Input was S/PDIF, output balanced -4 dBV.
I’m dropping the raw measurements here with little comments as long as the results are in line with what you’d expect from a device like this, since I’m mostly interested in the IMD measurements, after the last post… Continue reading
I’ve been looking at designing a D/A converter for a while now. In my experience these are some of the hardest audio components to do right. It started with building output stages over a decade ago and at some point I even found myself in a company designing a D/A converter transistor by transistor.
However, as recent experiments have shown, I still have a lot to learn.
As I mentioned in the ultranalyzer post I have been searching for ages for an AP System One, but hesitant to shell out big money for such an old, unsupported machine.
So what was I to do when a System Two came along…?
When you are using consumer-grade sound equipment to measure consumer-grade sound equipment you are potentially setting yourself up for a major pitfall: how do you know you will be able to see the DUT‘s performance and not that of your measurement gear? The first way to make sure is of course to use measurement gear of very high performance, outclassing most of the stuff that will be measured with it, leading to the choice of the delta 1010. But that’s only step 1. Therefore I decided to make some measurements to see what the 1010 is capable of. We should be able to get close to specifications of the D/A (and/or) A/D converter used, but how close and what that looks like remains to be seen! Continue reading
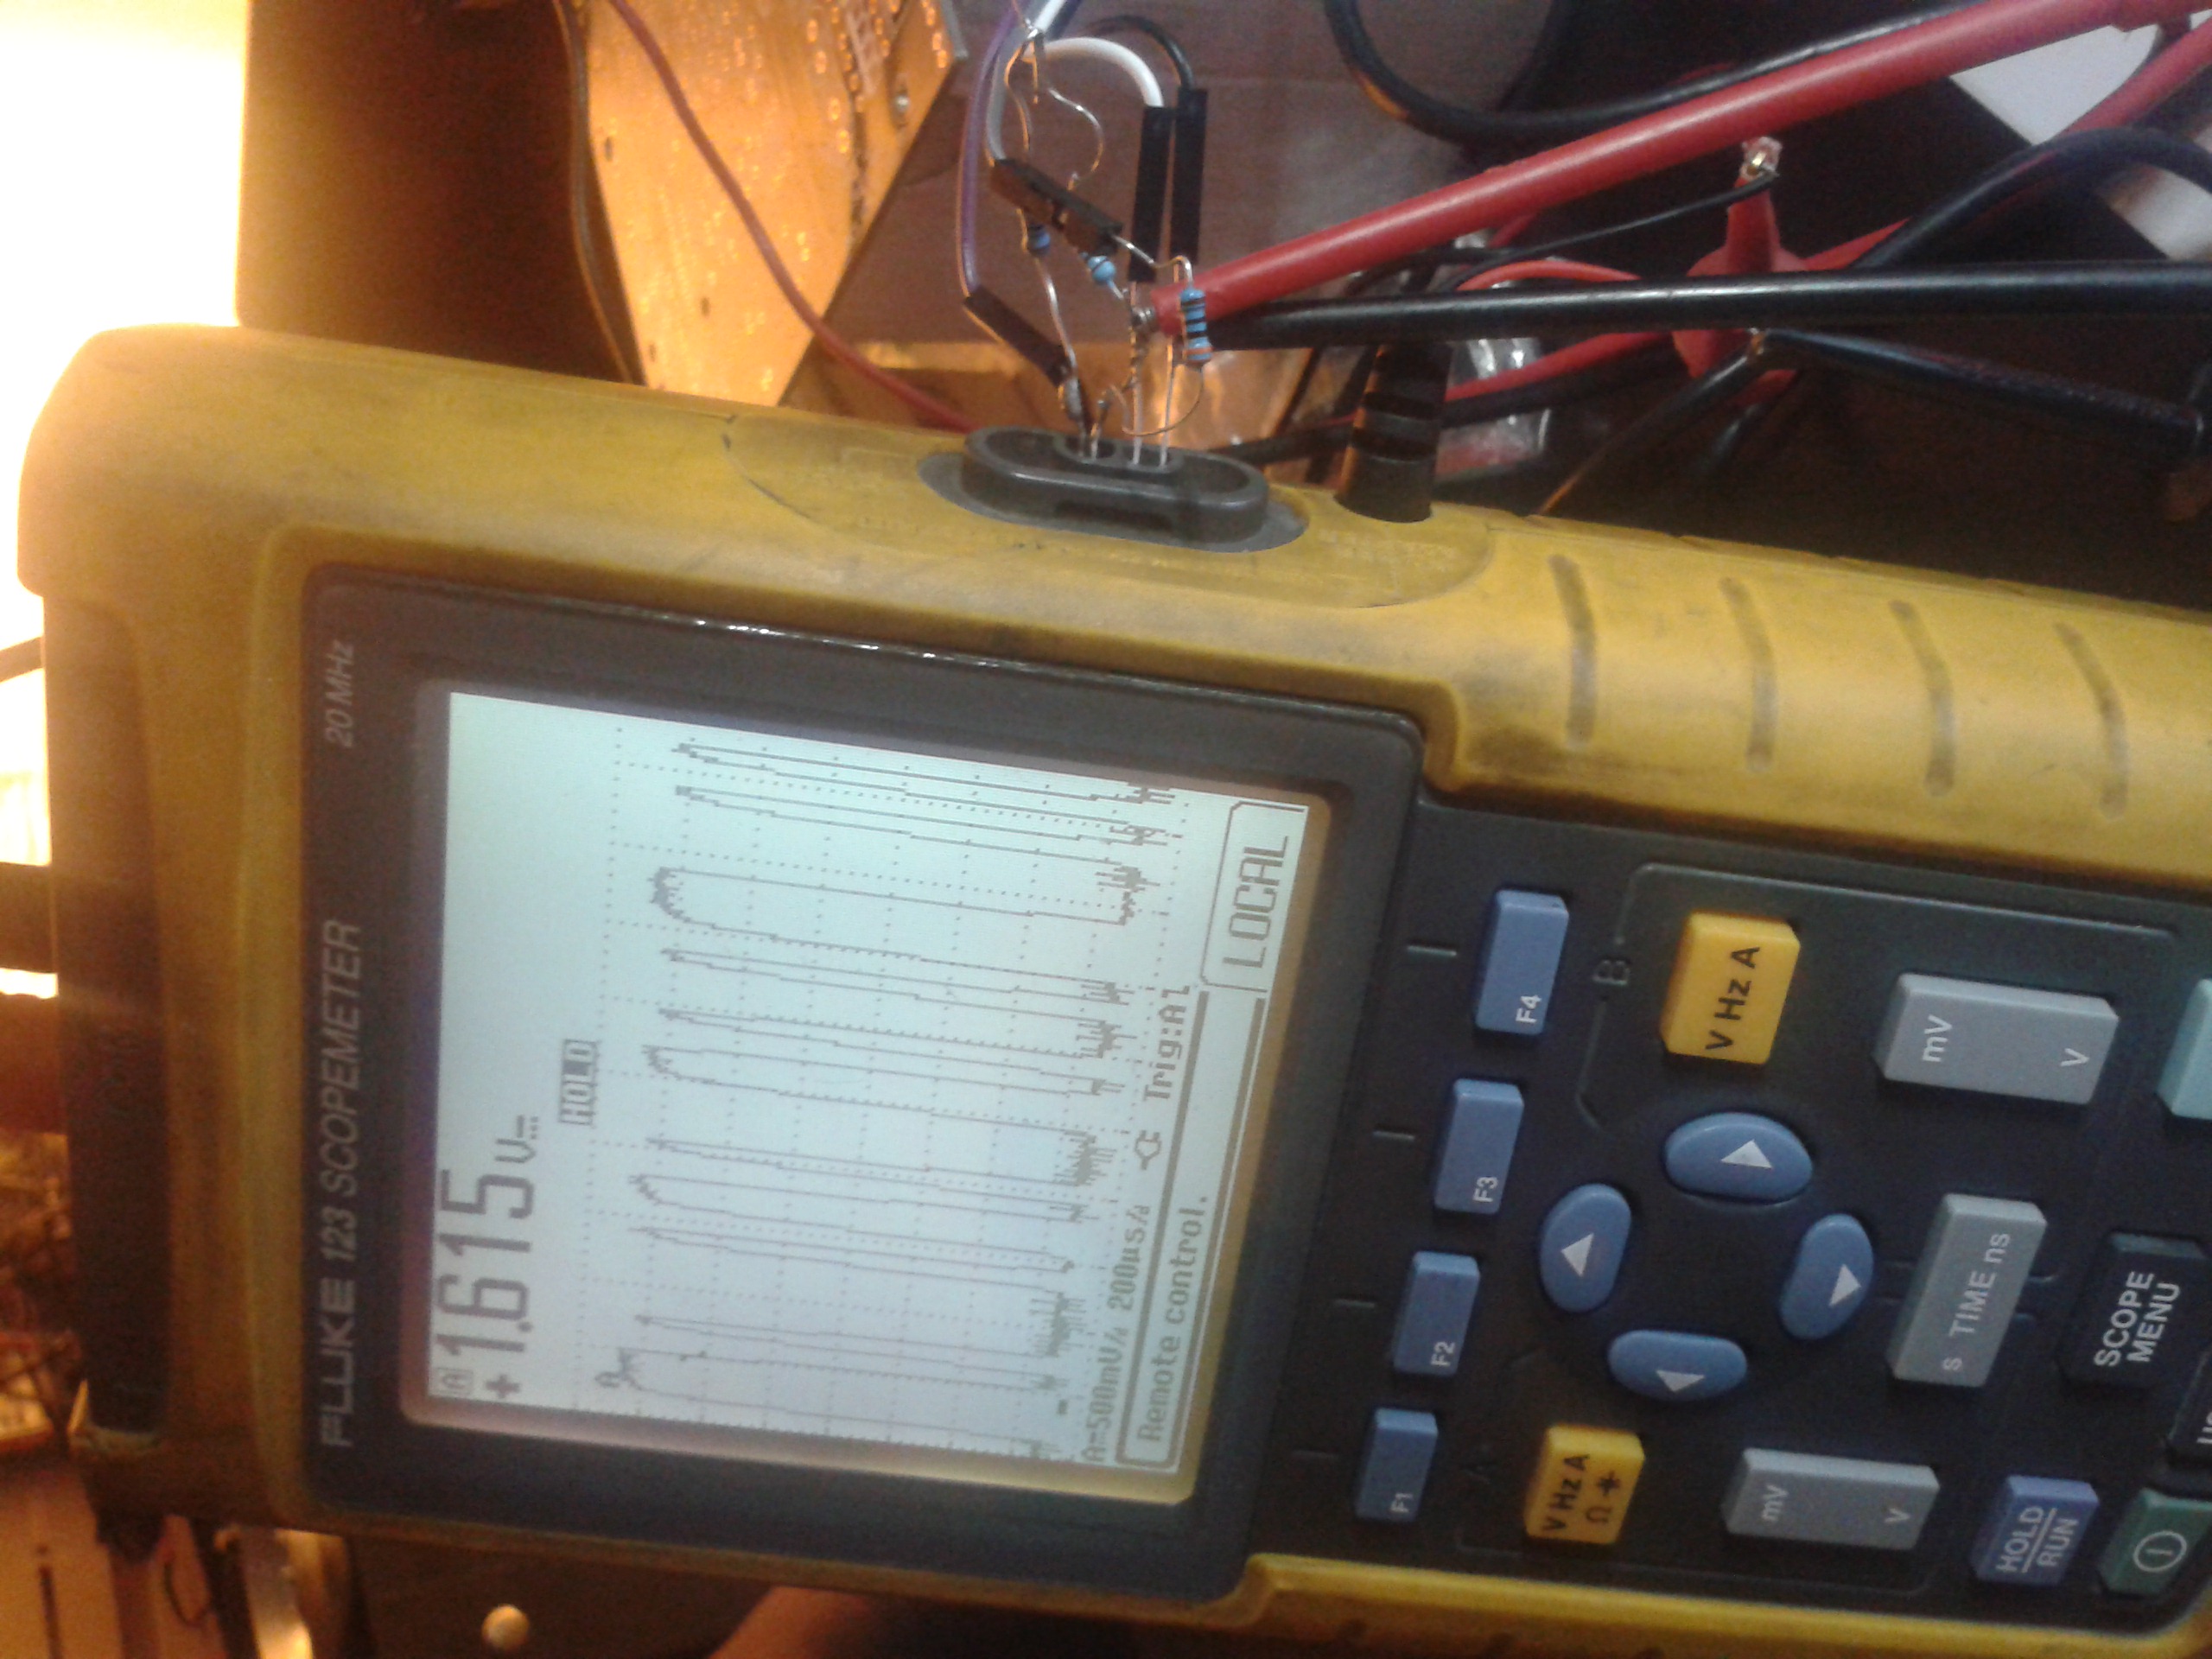
So, the scopemeter has a serial port for transferring measurements and even remote control. Cool!
Not cool: charging an arm and a leg for said cable (not to mention the software!). Boo, Fluke.
Of course I’m far from the first who got pissed off and figured out how to roll their own: Jan Wagner wrote a very concise page. I decided to one-up the laziness and went with the ready-made CP2101 USB-to-TTL solution. You can’t make a PCB yourself for that price. Of course the Chinese eBay supplier had a different pinout in his picture and on the silk screen, and on top of that… both were incorrect. Nothing a few measurements can’t fix, but did cost some time. Saved a buck, lost an evening. Oh well.
The IR transistor and photodiode I bought may well work with each other (825 and 900 nm? Really?), but not with the fluke. The culprit turned out to be diode. It needs to be really close to 800 nm. Unwilling to order one online and wait another week, I butchered a useless IR remote control and scavenged its diode.
Here’s a top tip: If you want to see if an IR diode is working, use a camera. Cameras see IR and on the screen it will look blueish/white. That’s also how to determine that the lower hole in the Fluke is the transmitting LED.
I had to alter some values slightly to get a good signal and arrived at the schematic below.

fluke scopemeter usb-ir converter schematic
The circuit is straightforward, the trick is in the mounting. A serial plug without plate, sides shortened, just about grabs onto the recesses in the optical port and very nicely hangs on to the scope.
prototype and a good example of NOT a good sturdy mount


All of 6 parts

…mount, align…

… and presto.

Fluke flash utility under Wine
Spend roughly 7 euros and an evening and you can have your 150 euro cable. Now unless your evening hours are very profitable, I’d call that a reasonable deal. In any case, sticking it to Fluke and getting this thing working was very rewarding 🙂

And of course, the proof of the pudding 🙂
As you may have noticed, there’s not much audio content here yet. That’s because I’m currently not only bubbling with ideas, but also working without good tools. So before we design anything, we need to have the right tools in order.
Priority one was a useful desk scope / multimeter: check.
Priority two is a spectrum / audio analyzer.
Now I actually do own one, I never threw away my trusty Spectral Dynamics SD375 . But as with my big Tektronix o’scope, it’s a bit of a boat anchor to keep around the house. So rest assured both of these are safely in storage, and I’m busy training my son to appreciate them so he can inherit and care for them one day hopefully far from today.
I’ve been scouting for an Audio Precision on eBay a bit, but without much success. I’m not ready to shell out thousands of bucks for something that is extremely cool, but still flawed. You see, the one thing an AP has going for it is credibility. You show any old weird curve and as long as it has the AP logo on the right hand top corner, you’re golden. And let’s not forget the bragging rights. “Yeah sure, I’ve got an AP at home” – gets all the girls!
But foregoing that, it has to be admitted that especially the system one machines are showing their age. The user interface runs under DOS or windows 98. Wow. forget attaching an internet enabled network cable to those beasts.
AP themselves do not recommend buying one. Of course if I was selling system twos, I’d also recommend against buying a machine I’m no longer selling. But they do have a point: there is some custom hardware in there and when that breaks, you’re done for. No support, no parts.
Reflecting on all of that for a bit, I pondered what the alternative could be. A good sound card with a PC sounds like the logical choice. A quick inventory actually turned up some quite decent parts:

VIA itx system
That should do it! As slow as this junk hardware is, it probably runs circles around the machines that AP had to work with. The downside is of course that this box will have to do all the heavy analysis (FFT, deconvolution, averaging, etc) lifting. Well, it’s an experiment.
Even though there are a few very nice audio analysis programs for windows, this box is going to run linux. No discussion. Hobby is supposed to be fun, not torture.
Due to the limited hardware capabilities it would have to be a pretty small foot print version, but at the same time it would have to be able to run some exotic software. That led me to Archlinux. Their modular design and custom package manager ticks the right boxes, and the support on their wiki is just stellar.
Getting Arch to run was easy enough. One hiccup was that the disk was formatted as a GPT partition and syslinux is not a good bootloader for that. At least I could not get it to run. GRUB2 did just fine and in just a few hours I had a running machine. Less time than a fresh windows install needs to pull in its 8,000 updates.
The window manager is LXDE, but mostly I’ll be logging in over SSH with X forwarding so just X11 would have been enough. The screenshots below are made on an Ubuntu machine using X11 forwarding.

Jack Alsa Audio Analyzer
The first analysis programs I installed are Jaaa and baudline. More on that in a subsequent post. It’s not exactly APone style functionality yet, but at least jaaa and japa are open source and that means what you don’t have, you can build. In this case it is unfortunately true that I only trust AP to do a proper implementation, and all others have to be open source and if not, I guess I have little choice but to lead the way. This story is just beginning…

Baudline
All in all, spending a day or so installing some very nice software and re-using dust-gathering equipment now means I can do some pretty impressive and reproducible measurements. As soon as I’ve cleared my desk and built this all into some enclosure…
What’s a hobby desk without a good ‘scope? A car with no engine. A fondue with no cheese. A church with no minister. A threesome with no, erm let’s get back to the topic.
Now, I have a good Tektronix rig but it’s a bit unwieldy to have in the house. So a nice scopemeter would do 99.999% of the time. Besides, it can also serve as a -very- good multimeter. Want!
Caveat: I have worked often with scopemeters and I love ’em. I know quite a few folk who don’t. It seems to be a matter of taste. So try one and decide which side you’re on.
I managed to shoot a broken Fluke 123 for beer money on the old Fleabay and it arrived pretty soon after, and it was immediately obvious: this poor bugger has lived a hard life. It was described as ‘does not power up’ which I prefer to ‘does power up but does not do XYZ’. The latter can give you big trouble, the former means it’s either a simple fix or simple to find out that it’s dead forever. In any case, simple. Simple is good. Simpler is good-er.

The Fluke 123 as it was advertised on eBay
The second thing I noticed is that it had a weird switch attached on the bottom left side. Bad news. Someone had been tampering with it in a very unprofessional way.

Fluke 123 Scopemeter in ‘service position’
Time to undress it and get to work. Now, credit where due: before buying the scopemeter I did a search on the internet for service manuals and found the one for the Fluke 123, downloaded it and read it from A to Z. And seriously, this is what service manuals should look like. Not just a schematic, no, explanations of what each circuit does AND a complete fault finding guide with extra care of what to when it doesn’t power up! Winners!
The first problem was not that hard to find: a broken diode with a very dodgy repair.

r badly borked diode
Yeah, that one let out the magic smoke so soldering the die to the cathode is not going to do very much (which is what was done to it when I found it!). Now of course the question is why did the diode break? Not knowing the answer I ordered 10 diodes and hoped they wouldn’t all blow up the same way. And they didn’t. The first replacement diode is still in there. Anyone need 9 diodes?

The broken diode in the power supply
As you can see the diode was part of the switch mode power supply for supplying juice from the charger.
Unfortunately, applying a charger voltage still only yielded a gut-wrenching whine from the flyback transformer. Not there yet!
Simply following the service manual’s suggestions led me to check the battery, its wiring and all related components. The battery turned out to hold no charge even when charged externally, not very surprising for its age. But then I found that the battery current measuring resistor (3x 1Ohm in parallel) measured 3.8 kOhm. That is plain odd.

Battery current measuring resistors
Now, without a proper voltage across these resistors the P-asic thinks that the battery is either full or over voltage, not that it’s empty so it tries to start up. The battery does not allow that it since it’s empty and even though the adapter circuit works, it’s not used (because a full battery is assumed present). So the whine is the flyback converter desperately trying to run on a dying battery with little help from the adapter since its supply isn’t running as the D-asic thinks its help is not necessary. Poor little flyback.
Resistors replaced and the whine is gone! Instead we get a nice beep from the loudspeaker indicating the software bootloader is active, and a second or two later I hear the relays in the input pathways click. Good news! This sounds like a working scopemeter! Alas close but no cigar… the screen is on, the backlight works, but it’s all black…
This is where you are on your own as the service manual says ‘sorry dude, the screen is not serviceable’. In other words, Fluke bought it from an external supplier and didn’t develop it by themselves. And you really can’t expect them to write a faultfinding guide on a part they did not design.
Connecting my trusty Tektronix told me that there is activity on all the connector pins such as framesync, line sync, the voltages are all good, actually it should just work. What in the world…
And then I saw it.
A drop of soldering tin, I will maintain until my dying breath not dropped by me (I had the display board covered), had fallen on the board. Right across a bypass capacitor of some sort. And probably shorted a nice data or supply line. Simply scratching it off with a screwdriver was all that was needed, and voila!

She lives!
Time for a little dance; you just earned about five hundred bucks!
Oh and for those who wonder about the weird switch; it turns out the foil cable from the keyboard had been damaged. Probably by the same person who broke the diode. Simply melted one conductor on the outsdide. So a crude makeshift power switch had been added. I instead fitted an iPhone switch under the real power key. Of course the best solution is to simply order a new foil from Fluke. I might do that one day, but it works just fine without and not only are they expensive, it’s hard to order them. Fluke if you’re listening: put up an online spare parts order page!
I did some reading on the internet and it turns out these scopemeters are not at all happy to live with a fully discharged battery. The battery needs to hold some charge and build up some voltage quickly because the charger supply can deliver quite some current. That is probably how my sample blew its current measuring resistors. They were rated at one Watt each, so it had managed quite something to break them. The replacements I fitted are 6x 2 Ohms at 2 Watt each. It was quite a snug fit.
The diode, I think, was simply damaged by brute hands trying to find the resistor problem. I did not look like it had been blown up electrically.
Next step was to order a replacement battery. It arrived but didn’t charge at all. Again service manual to the rescue: wonderful, the chinese manufacturer had miswired the plug. Well that was an easy fix and now I can go for hours on battery power. That will be great when doing work on the car.
As I didn’t get the original power adapter with the scopemeter I dug into a box and bodged one from a wall-wart and a battery plug. The Fluke adapter port is quite particular in that the outside is + and the inside is -, so do take care there, although plugging it in the wrong way does not damage the meter (or so I heard. Ahem.).
So, with some luck but mostly a great service manual this new buddy of mine has been given a new lease on life and I have regained lots of desk space 🙂